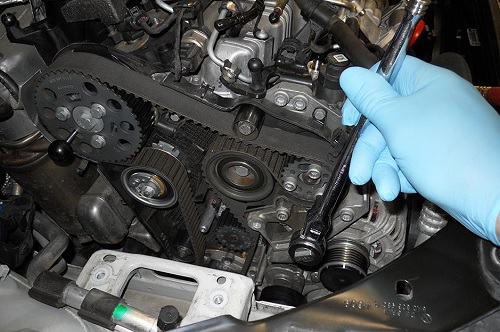
Cambelt Change VW Golf Procedure
VW Golf Cambelt Change? Sounds ok? Do you know how to complete the cambelt change VW Golf process by yourself? We are here to help you, folks! In recent years, Volkswagen vehicles have been equipped with the 1.6L 16V engine in large numbers. Every 55,000 miles, then every 18,000 miles after that, the manufacturer advises examining and, if required, replacing the timing belt. However, when doing this maintenance, severe errors are frequently made. It is recommended that you replace the tension pulley, idler pulley, tensioner, and water pump along with the belt during the 2.5-hour procedure.
Cambelt Change VW Golf
First, use the engine code to identify the car, and then unplug the battery. Once the timing belts have been taken off, the crankshaft and camshaft must not be turned. Turn the engine in the typical direction of rotation after removing the spark plugs to make it easier to turn (clockwise). Make sure you adhere to all specified tightening torques and only turn the engine at the crankshaft sprocket. Do not turn the engine at any other sprockets.
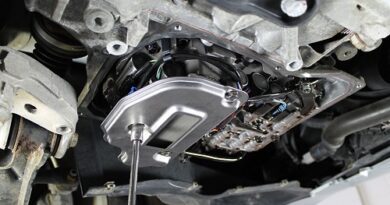
The camshaft belt removal Supports the front of the car by jacking it up. Then remove the steering oil storage tank, upper timing belt cover, entire air filter, and upper engine cover (DO NOT detach the hoses).
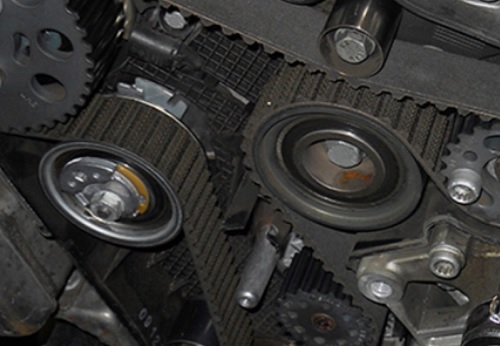
The control markings on the crankshaft belt pulley are in line as you turn the crankshaft to the right to TDC (OT) in the first cylinder. Then verify the alignment of the locating holes on the camshaft sprockets. Turn the crankshaft to the right a further full turn if they are not.
Preliminary Work
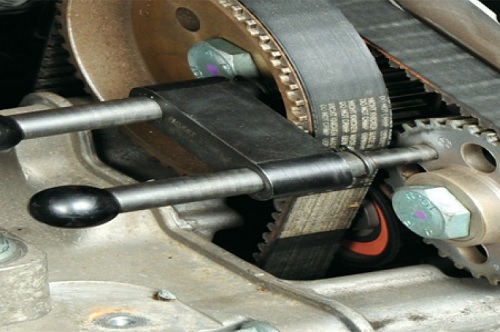
Choose the locking device that corresponds to the vehicle’s engine code and place it at the camshaft sprockets. The right-hand engine mount, right-hand engine mount holder, and right-side lower engine cover are removable. When you can reach the crankshaft belt pulley screw, lower the engine. Take off the drive belts for the accessories (V-ribbed belts). Remove the crankshaft belt pulley screw and insert the proper arrester for the crankshaft belt pulley. Before removing the crankshaft belt pulley, remove the arrester and unscrew the crankshaft belt pulley screw. Attach two washers to the crankshaft belt pulley’s fastening screw. The crankshaft belt pulley screw is with installation.
Lower timing belt cover removal To make things easier, you may also need to remove the tension pulley and idler pulley of the V-ribbed belt on some models with air conditioning. The tension pulley screw should be undone. To release the tension on the belt, turn the tension pulley to the left. Put the timing belt and camshaft locking tool back in place after removing them.
Disconnecting The Exhaust Camshaft Drive Belts
The tension pulley screw is in the working procedure. So to remove the strain on the timing belt, turn the tension pulley to the right. Drive belt tension pulley, drive belt, and tension pulley screw removal.
Installing The Exhaust Camshaft’s Driving Belts
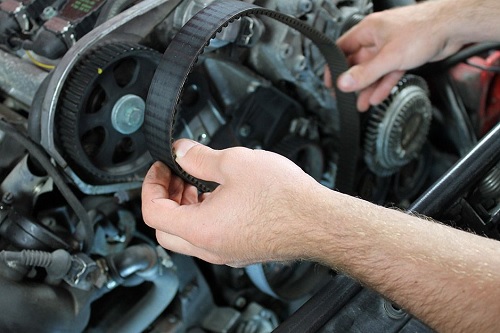
The camshaft sprockets are where the locking tool must have been inserted. Starting at the top of the intake camshaft sprocket, position the timing belt clockwise. Verify that the camshaft sprockets are tightly apart by the timing belt. So in the installation position, maintain the tension pulley.
Adjust the eccentric of the tension pulley such that the Allen screw faces the three o’clock position. Then the tension pulley and tension pulley screw are with installation. The tension pulley screw is finger-tight after the process. So please take note that the mounting board’s retaining lug must fit within the cylinder head hole.
When the pointer is flush with the marking for the mounting board’s clamp, turn the eccentric of the tension pulley to the left (pictured below).
The tension pulley screw should be 20Nm tight.
Putting In The Camshaft Belt
The camshaft sprockets must have held the locking tool in place. The crankshaft sprocket’s control marking is in the lineup. Set the tension pulley in place. The screw on the crankshaft housing is in the fork of the base plate. Use the Allen key to turn the eccentric of the tension pulley at the 10 o’clock position counterclockwise. Hand-countersinking the screw. Then place the water pump, tension pulley, crankshaft sprocket, idler pulley, intake camshaft sprocket, and idler pulley on the water pump, respectively. Clockwise rotation of the Allen key.
The mounting board’s recess (to the right of the fork) must be flush with the pointer. To 20 Nm, tighten the tension pulley. Then take the arrester off. Twice turn the engine in the direction it rotates. Engine placement should be near the top dead center of cylinder 1. Put in the arrester for the camshaft. Placing the locking pins in. The locking pins’ ends need to be the same height. Adjust the control times if the arrester are not with insert possibilities.
Recheck the tension of the timing belt. Crankshaft belt pulley screw removal. Install the crankshaft belt pulley, lower timing belt cover, and the freshly oiled crankshaft belt pulley screw. Put in the crankshaft belt pulley’s arrester (as per engine code). The crankshaft belt pulley screw is to a torque of 90 Nm plus 90°. Install the components in the reverse order of removal after removing the arrester. On the given sticker, note the replacement of the original ContiTech timing belt, and attach it to the engine compartment. Finally, drive the car or give the engine a test run.